Soya and Capsicum Wraps

Soya nuggets are very good source of protein and it is a perfect ingredient to use for making breakfast and school tiffin. 

Today, after a long time I made these wraps. Red and yellow capsicums give a good flavour and crunch to the filling. This is a complete, healthy and a wholesome meal and kids favourite too:)


Ingredients 

For the rotis ( base for the wraps

——————————

Multi grain flour – 1+1/2 cups + as much required for dusting 

Ghee – 1 tsp

Salt to taste 

For the stuffing 

—————-

Soya nuggets – 1/2 cup

Chopped red capsicum – 1/2 cup

Chopped yellow capsicum- 1/2 cup

Chopped spring onion – 1/2 cup

Chopped spring onion greens – 1/2 cup

Chopped garlic – 1/2 tsp

Oil – 2 tsps

Pepper powder – 1/2 tsp

Soya sauce – 1/2 tsp

Vinegar – 1/2 tsp

Tomato ketchup- 1 tbsp 

Salt to taste.

Ghee- as much required for grilling the wraps.

Method

To make the rotis (base for the wraps)

———————————-

Add the flour, salt to taste, ghee in a big bowl and mix well. Add required amount of water and knead it into a smooth and pliable dough.

Let it rest for 15-20 mins. Divide the dough into 8 portions. Make thin rotis and keep it aside.


To make the stuffing 

———————–

Soak the soya nuggets in boiling water for 10-15 mins.

Drain the water and wash well ( 2-3 times). Squeeze the nuggets well till it becomes dry.

Heat oil in a pan. Add the chopped garlic. Sauté for few seconds and add the chopped onion. Sauté till the onions turn golden. Add the soya nuggets. Sauté for few mins and add the chopped capsicums. Sauté for few mins. Add salt to taste and pepper powder. Sauté till the capsicums become soft. Add soya sauce, vinegar and tomato ketchup and sauté for few seconds. 

Take it off the gas and the chopped spring onions green. Mix well and let it cool for mins.


To make the wraps

—————————

Take one roti. Keep some filling on one side and roll it tightly. Similarly make rolls ( wraps ) with the remaining rotis.


Grill the wraps on a tawa using ghee till it turns golden brown. Flip the wraps gently and cook till the other side too turns golden. 


Cut and serve the wraps hot or warm with ketchup.


Mango and Pineapple Pickle

This is an easy to make and yummy instant fresh pickle. I make this to make my kids eat pineapple as they are not fond of fruits. But they never say no to this spicy, sweet and sour and yummy pickle:)   
Ingredients

Chopped mango – 2 cups

Chopped pineapple – 1 cup

Sesame oil – 2 tbsps

Red chilli powder – 1 tsp

Turmeric powder – 1/4th tsp

Salt to taste

Hing ( asafoetida/ perungayam) – 1/8th tsp

Mustard – 1 tsp

Method

In a big bowl, add the chopped mangoes, pineapple, red chilli powder, salt to taste and turmeric powder and mix well.

Let it rest for few mins.

  
Heat the sesame oil in a pan. Add the mustard. When it starts spluttering, add the hing. Sauté for few seconds and add the tempering to the pickle.

Mix well and let it rest for few mins and then serve:)


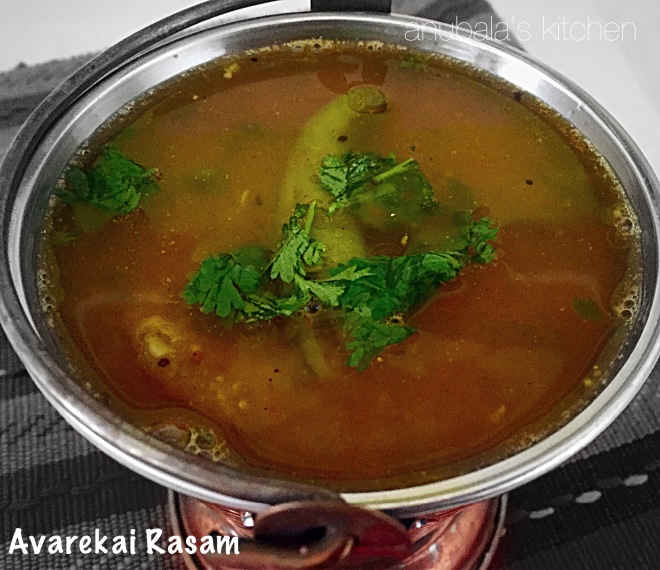
Avarekai Rasam

As I have mentioned before, rasam is my most favourite dish and I never get bored of trying different varieties of rasam. And today, I created my own recipe.

I made rasam with Avarekai ( broad beans). Generally I make only dry curry with avarekai. 

I saw a rasam recipe made with field beans ( avarekalu chaaru) . That gave me the idea to make this rasam as I didn’t have field beans with me. It had cloves and cinnamon in the rasam powder which I found very new interesting. 

I made some variation in the Udipi rasam ( spice proportion) and added cloves and cinnamon to it. It was that additional spices which made this a super hit at home. Both my kids loved it:)

Needless to say, I was super thrilled with my creation:)


Ingredients 

Chopped avarekai – 1/2 cup

Tomatoes – 2 medium sized

Tamarind – goose berry sized

Tuvar ( Pigeon peas) – 1/2 cup

Turmeric powder- 1/2 tsp

Grated jaggery- 1 tsp

Salt to taste 

Coconut – 2 tbsps

For the rasam powder

——————-

Coriander seeds- 2 tsp

Red chillies – 4-5

Pepper – 1/2 tsp

Cumin seeds ( jeera) – 1 tsp

Fenugreek seeds( methi/ vendhayam) – 1/2 tsp

Mustard – 1/2 tsp

Chana dal ( Bengal gram/ kadala paruppu) – 1 tsp

Urad dal ( black gram/ ullundhu) – 1/2 tsp

Cloves – 2 

Cinnamon- 1/4th inch

For tempering 

————

Ghee – 1 tsp

Mustard – 1 tsp

Cumin seeds – 1/2 tsp

Green chillies – 2

Hing ( asafoetida/ perungayam) – 1/4th tsp

Chopped coriander leaves – 2 tbsps

Method

Soak tamarind in 2 cups of water for 30 mins. Squeeze well and take the extract.

Wash and soak tuvar dal for 30 mins. Drain the water completely. Add fresh water and 1/4th tsp of turmeric powder. Pressure cook the dal for 3-4 whistles or till it’s cooked very soft.

Wash and chop the tomatoes.

Wash and slit the green chillies.

Wash the coriander leaves.

In a pan, add tamarind extract, chopped avarekai, tomatoes, remaining turmeric powder, jaggery and salt to taste. Mix well and let it boil till the vegetables become soft.

  
Meanwhile, dry roast the ingredients mentioned for rasam powder. 

  
Cool and grind it along with coconut to a powder. Mix it with a cup of water and add to the boiled tamarind mixture.

Add the mashed tuvar dal and add 1 more cup of water and mix well. If required add more water to get the rasam consistency. It will slightly thicker than the regular rasam.

Check for the seasonings and let it simmer.


 Heat ghee in a pan. Add mustard. Once it starts spluttering, add cumin seeds, hing and green chillies. Sauté for a min and add the tempering to the rasam. Garnish with chopped coriander leaves.

Serve the rasam hot with steamed rice drizzled with little melted ghee and a vegetable curry:)


Rice and Coconut Cake

It’s my sister’s birthday today and I wanted to bake a cake for her. And it had to be gluten free, lactose free and without chocolate. 
I was browsing for such recipe in the net but didn’t find anything very appealing. Then I got this sudden idea of making a cake with the Nei appam batter. The Nei appam that I make has a very soft and melt in mouth texture. ( she is very fond of Nei appam).

I worked out few additions to the recipe and after praying God to make my crazy idea a success, started making this cake.

Soon my house was filled with sweet aroma of coconut, cardamom and jaggery. I was so excited that I couldn’t stop smiling.

The cake was moist, soft, perfect in texture and flavour and absolutely divine. I was indeed very very happy with myself and icing on the cake was really my sister’s expression when she had her first bite:)

  
Ingredients 

Basmati Rice – 1 cup

Grated jaggery – 1 cup

Ripe banana – 1

Grated coconut – 1 cup, tightly packed

Cardamoms – 4-5 ( use only the seeds)

Ghee – 3 tbsps + 1 tsp ( 1 tsp ghee for greasing the cake pan)

Coconut oil – 4 tbsps

Baking powder – 1/2 tsp

Baking soda – 1/4th tsp

Rice flour – 1 tbsp ( for dusting)

For garnish 

————

Ghee – 2 tsps

Almond flakes – 2 tbsps 

Grated coconut – 1 tbsp

Icing sugar – 1 tbsp

Method

Wash and soak basmati rice for 2 hrs.

Preheat the oven to 180 degree Celsius,

Grease a cake pan with ghee ( have used a bundt cake pan) and dust it with rice flour.

Drain the rice. Add coconut, jaggery, bananna ( chopped) and cardamom seeds to the rice and grind it to a smooth batter without adding any water.

  
Transfer it to a bowl. Add ghee, coconut oil, baking powder and soda and beat well until the batter becomes light and fluffy.


 Pour it into the greased and dusted cake pan and bake in the preheated oven for 25-30 mins. 

The cake is done when a toothpick or knife inserted into the cake comes out clean.

Remove the cake from the pan and let it cool completely.


Heat 2 tsps of ghee in a pan. Add the almond flakes and sauté till it turns golden.

Sprinkle icing sugar on the cake and garnish it with crisp, golden almond flakes and grated coconut.

Serve the cake warm:)


Ammani Kozhakattai 

Ammani Kozhakattai which is made on Vinayaka Chaturthi ( Ganesh Pooja)
is actually steamed mini rice dumplings which are stir fried to make it crisp. It’s one of the most favourite snack of my family.

There are many recipes for this Kozhakattai. Today am sharing my version of the recipe. Hope you all would like it 🙂

  
Ingredients

Proceeded rice flour – 1 cup

Water – 1+1/2 to 2 cups

Sesame oil – 1 tbsp + 3 tbsps

Salt – a pinch

Urad dal( black gram/ ullundhu)- 1/2 cup

Red chillies – 4-5

Asafoetida( hing/ perungayam) – 1/2 tsp

Red chilli powder – 1/2 tsp

Grated coconut- 4 tbsps

Curry leaves few 

Sesame oil – 4 tbsps

Mustard – 1 tsp + 1/2 tsp

Method 

Ready made processed rice flour for making Kozhakattai is available almost every where in Chennai. I have used ready made rice flour only.

To make processed rice flour at home

———————————————

Wash and soak rice for 15-20 mins.

Drain completely and spread it on a thick kitchen towel and dry it under the shade.

When it’s almost dry, get it ground in a flour mill to a powder or you can grind it at home.

Add rice flour, water and a pinch of salt in a pan and mix very well. Ensure that there are no lumps. The mixture should be of dosa batter consistency.

Heat a pan. Add oil and the rice flour mixture and keep stirring continuously. 

Cook till the mixture becomes thick and non sticky ( when you pinch it with your fingers, it should not stick). Let it cool. 

  
Wash and soak urad dal for 1-2 hrs.

Drain completely. Grind the urad dal along with red chillies, hing and salt to taste to a a coarse paste adding little water.

Heat 2 tsps of oil in a pan. Add 1/2 tsp of mustard. When it starts spluttering, add curry leaves and the ground urad dal paste and sauté for few mins. Reduce the flame, close the pan with a lid and cook till it becomes non sticky. Take off the gas and let it cool.


 To make the Ammani Kozhakattai 

———————————-

In a big bowl, add the cooked rice flour, urad dal mixture , 1 tbsp oil, red chilli powder and grated coconut . Mix very well and knead it to a smooth dough. Check for the seasonings. If required, add more salt and knead again. 

 Make small balls with the dough. 

 Steam the balls ( Kozhakattai) for 10-12 mins.

Let the steamed Kozhakattai cool down completely.

Spread it in a tray.

Heat the remaining oil in a pan. Add mustard. When it starts spluttering, add the curry leaves and the steamed kozhakattais.


 Cook on a medium flame. Sauté till it turns golden and crisp.

Serve the Kozhakattai warm or at room temperature:)


Cabbage Masala Vadai

I used to make masala vadai using chana dal( Bengal gram/ kadalai paruppu). Once, I read in a magazine that masala vadai made with matar dal are more crispy and yummy, just like what is sold in the tea shops.
So, I tried with matar dal. The first time I made this vadai, I was so excited as it came out super crispy and yummy. From that time, I always use matar dal to make masala vadai and it has always been a hit with everyone.

Generally, I add chopped onions to make masala vadai. But when I make during festival days, I use cabbage or carrots or mixed vegetables to make masala vadai as we don’t use onions during festival days.

Of all the vegetables, cabbage is the best substitute for onions. Presenting to you all my fool proof recipe for cabbage masala vadai:)

  
Ingredients 

Matar Dal ( Pattani paruppu) – 1 cup

Fennel seeds( saunf/ sombu)- 1 tsp

Red chillies – 4-5

Hing ( asafoetida/ perungayam) – 1/4th tsp

Chopped cabbage – 1+1/2 cups

Chopped curry leaves – 2 tbsps

Chopped coriander leaves – 2 tbsps

Salt to taste

Oil for deep frying

Matar Dal

 Method

Wash and soak matar dal for 2 hours. Drain the water completely. 

Add fennel seeds, hing, red chillies and salt to taste to the drained dal.  Grind this to a coarse batter. Add very little water while grinding.

It is very important to have a coarse batter to make crispy vadai.

To the batter, add the cabbage, curry leaves and coriander leaves and mix very well.

Check for the seasonings.


 Heat oil for deep frying. Take a small portion of the batter, shape into vadai and deep fry till it turns golden brown and crisp on both sides.
 

 Remove and drain the excess oil. Similarly make vadai with the remaining batter.

Serve the vadais hot with ketchup 🙂


Shahi Paneer Wraps

My daughter wanted me to give her paneer wraps as it has been a long time since I made that for school tiffin. 
I had this eastern shahi paneer masala packet with me. So, instead making the paneer the usual way with onion, tomatoes, I made shahi paneer as the the filling. I made it as a thick sauce so that it will not make the wraps soggy.

The shahi paneer masala was really very good, as good as served in any good North Indian restaurant. I was really happy with the results and my family loved it:)


Ingredients

Whole wheat multi grain flour – 1 cup + as required for dusting 

Ghee – 1 tsp 

Salt to taste 

For Shahi Paneer filling

————————————-

Paneer – 200 gms

Shahi paneer masala packet – 1

Milk- 1 cup

Butter – 2 tsps

Salt to taste

Chopped coriander leaves – 2 tbsps 

Tomato ketchup – as required 

Ghee – as required to grill the wraps.

Methods

In a bowl, add wheat flour, ghee and salt to taste. Mix well. Add required amount of water and knead to a smooth dough. Rest the dough for 15-20 mins.

Divide the dough into 6 portions. Take one portion, make a smooth ball. Flatten it gently, dust generously with flour and roll into a circle.

Heat a tawa and cook the rotis on both sides till brown spot appear on both sides. Keep it aside.

To make Shahi paneer

———————————–

Mix the contents of the packets with one cup of well. Ensure that there are no lumps.

Cut paneer into cubes.

Heat a pan. Add butter. To the melted butter, add the shahi masala mixture and salt to taste. Stir and cook till it thickens. Add the paneer cubes and mix well. Sauté gently for few mins. 

Take off the gas and add chopped coriander leaves. Let it cool for few mins.


To make the wraps

Take one roti. Place some paneer filling on one side. Drizzle some ketchup over it and roll it up tightly. Similarly make wraps with the rest of the rotis.

Heat a tawa. Brush it with ghee. Grill the wraps on the tawa till both sides turn golden.


Cut the wraps into 2 or 3 pieces and serve it hot with ketchup:)


Methi Moong Millet Khichidi 

This is a easy to make and a very healthy one pot meal. 
Today, I had gone out for shopping with my daughter and my dad. We had lunch out and I didn’t do much cooking in the morning. 

Though I thoroughly enjoyed my shopping trip, I was quite tired and was not in a mood to make anything elaborate for dinner. 

So I made this simple, wholesome and a delicious one pot meal. We enjoyed having this khichidi with mango pickle, potato chips and raita:)

  
Ingredients

Split yellow moong dal – 1/2 cup

Little millet ( samai/ kutki) – 1 cup

Chopped methi leaves – 1 cup

Salt to taste

For tempering

———————–

Ghee – 4 tsps

Mustard – 1 tsp

Cumin seeds ( jeera) -1 tsp

Crushed pepper – 1 tsp

Cumin powder – 1 tsp

Pepper powder – 1/2 tsp

Asafoetida ( hing/ perungayam) – 1/4th tsp

Chopped tomato – 1/2 cup

Turmeric powder – 1/2 tsp

Curry leaves- few

Method 

Dry roast moong dal and millet till you get a good aroma. 

Cool and wash well. Add 4 cups of water and chopped methi leaves ( washed and strained). Add salt to taste, mix well and pressure cook for 4-5 whistles. It should be cooked very soft.

 Heat the ghee in a pan. Add mustard. When it starts spluttering, add cumin seeds, crushed pepper, cumin powder, pepper powder, hing and curry leaves. Sauté for few seconds and then add chopped tomatoes and turmeric powder. 

Sauté till tomatoes turn soft and add 1/4th cup of water. 


Add the tempering to the khichidi and mix well.

Drizzle little melted ghee and serve the khichidi hot with papad or chips, raita and pickle:)


Chenna Mango Rabdi

This is a simple, easy to make, healthy and and a delicious dessert. I have followed Tarla Dalal recipe. 

Chenna, made at home by curdling full-fat milk, is thickened and sweetened to make a delicious Chenna Rabdi. I have added some mangoes to make it more interesting and healthy.

I made this for the first time today and am totally happy and impressed with the result:)


Ingredients

Full cream milk – 1 lt

Sugar – 1/2 cup

Citric acid crystals – 1/4th tsp

Cornflour – 3 – 31/2 tsps

Saffron ( kesar) – a big pinch 

Cardamom powder – 1/2 tsp

Chopped mangoes – 2 cups

Almond flakes – 1/4th cup

Method 

Mix cornflour with 3 tbsps milk and keep it aside.

Soak saffron in little warm milk.

Heat rest of the milk in a heavy bottom pan.

When it starts boiling, add 1/2 cup sugar and mix well.

On a medium flame, boil the milk till its reduced to half. Keep stirring occasionally.

When it reduced to half, dissolve the citric acid crystals in little water and add to the milk. Mix well and cook for few mins till the milk curdles completely.

Now add the cornflour slurry to the curdled milk and cook for 2-3 mins.

Take it off the gas and add the saffron and cardamom powder.

Mix well. Cool for sometime and keep it in the fridge to chill. 


Before serving , mix the chopped mangoes well.

Garnish with almond flakes or pista and serve immediately:)


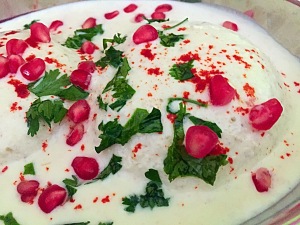
Thair Idli

Yogurt in known as Thair in Tamil and Dahi in Hindi.

My best friends from college had come home for lunch today. I had made a South Indian lunch. For starters, I had planned to make masala vadai. Then I thought instead of that I’ll do something which will not involve deep frying. 

I have  made this Thair idlis before and it was well appreciated by everyone. So I decided to make it for my friends today.

They liked it very much and I was very very happy:) Sharing this simple recipe with you all. Hope you would like it too:)


 Ingredients 

Idlis – 12 

Yogurt – 2 cups

Sugar – 1 tsp

Salt to taste

Asafoetida ( hing/ perungayam) – 1/8th tsp

To grind to a paste 

———————–

 Grated coconut- 1/2 cup

Almond ( badam)flakes – 1/4th cup

Green chillies – 2-3

Cumin seed ( jeera) – 1 tsp

For garnishing

————————

Chopped coriander leaves – 1 tbsp

Pomegranate – 1/2 cup

Red chilli powder – 1/2 tsp

Method

Grind coconut, almond flakes, green chillies and cumin seeds to a smooth paste adding little water.

Beat the yogurt well. Add the ground paste, sugar, salt to taste and 1/2 cup of water. Mix well. Keep it the fridge till required.

To serve the Thair Idli

———————————–

First soak the idlis in plain water for 5 mins.

Take it out and squeeze it dry gently.


 Arrange the idlis on a serving plate.
Pour over some generous amount of yogurt sauce over the idlis.

Sprinkle some red chilli powder, garnish with chopped coriander leaves and pomegranate and serve immediately:)